Healing
|

|
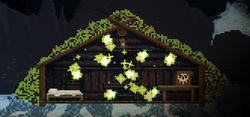
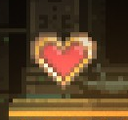
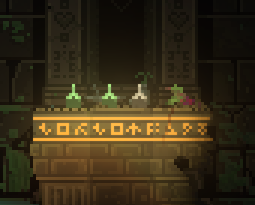
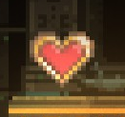
| Health Pickups: Full Health Restore, as seen in a Holy Mountain (left); Extra Max Health, found in a level (right); an unoccupied Kammi (bottom). | |
Healing is a key part of Noita's roguelike experience. Although healing comes more commonly in the form of Health Pickups in the Holy Mountain, there exist other sources of healing, some based on magic and some not.
HP (health points or hit points or simply health) is presented as a numerical value representing the amount of health you have. You begins each game with 100![]() and can gain an increase in maximum health by collecting Extra Max Health, which will typically increase the maximum health you can have by 25
and can gain an increase in maximum health by collecting Extra Max Health, which will typically increase the maximum health you can have by 25![]() . However, this is only an extra allotment which is usually refilled in a Holy Mountain.
. However, this is only an extra allotment which is usually refilled in a Holy Mountain.
Once you reach 0![]() health, you will die. This is a permanent death and is only reversible if you have the Extra Life perk.
health, you will die. This is a permanent death and is only reversible if you have the Extra Life perk.
Health Pickups
Health Pickups are Pickups that can be collected in-game which generally have a beneficial effect, though their exact effect can vary. They all have a heart-shaped appearance, with some variance depending on the type of health pickup.
Full Health Regeneration
Full Health Regeneration is a pickup which fully heals you when picked up. When found in a Holy Mountain, it also increases your max HP by 10![]() . It has a similar red and gold heart appearance to the Extra Max Health pickup, but lacks the plus sign in the upper right. Unlike Extra Max Health, this HP increase still takes effect after picking Glass Cannon, and its max HP increase is unaffected by the Stronger Hearts perk.
. It has a similar red and gold heart appearance to the Extra Max Health pickup, but lacks the plus sign in the upper right. Unlike Extra Max Health, this HP increase still takes effect after picking Glass Cannon, and its max HP increase is unaffected by the Stronger Hearts perk.
Full Health Regeneration containers can be found:
- In Holy Mountains
- Very rarely from Treasure Chests
- In the Dark Cave
Extra Max HP
Extra Max HP is a pickup which increases your maximum HP by 25![]() , without healing them. It has the appearance of a large red heart with a golden border, as well as a plus sign in the upper right corner. If you have picked the Stronger Hearts perk, maximum health will increase by 50
, without healing them. It has the appearance of a large red heart with a golden border, as well as a plus sign in the upper right corner. If you have picked the Stronger Hearts perk, maximum health will increase by 50![]() or more instead, depending on how many stacks of the perk you have. If you have picked Glass Cannon, this pickup has no effect and a message will be displayed stating that "some sort of curse" blocked the HP increase.
or more instead, depending on how many stacks of the perk you have. If you have picked Glass Cannon, this pickup has no effect and a message will be displayed stating that "some sort of curse" blocked the HP increase.
Extra Max HP containers can be found:
- Randomly in the world
- Inside Treasure Chests
- Familiar Orbs of True Knowledge
- In the Dark Cave
- Dropped by most mini-bosses when killed
- Dropped by Jättimato (50% chance)
Large Extra Max HP
The Large Extra Max HP is a more potent version of the regular Extra Max HP, and increases your maximum HP by 50![]() . They are much rarer than the normal Extra Max HP, and can be found in Treasure Chests, or dropped by Limatoukka. The Stronger Hearts perk will also increase this pickup's health value depending on the number of stacks you have.
. They are much rarer than the normal Extra Max HP, and can be found in Treasure Chests, or dropped by Limatoukka. The Stronger Hearts perk will also increase this pickup's health value depending on the number of stacks you have.
These look identical to Extra Max HP pickups.
Cursed Extra Max Health
Cursed Extra Max Health is a pickup which can only be found in Parallel Worlds. It is found inside Orbs Of Corrupted Knowledge which take the place of all orbs in parallel worlds and appears as a sickly purple version of the other health pickups.
It shares the base effect of the Large Extra Max Health pickups, but also applies a hefty Poison effect to you for 33.3 seconds, which will slowly chip away a large portion of your health. While this cannot kill you in the normal game, in New Game + the Poison damage is heavily amplified and can kill you on its own. By New Game ++++ (NG+4) the poison will deal more than your full health in damage per tick.[1]
Ambrosia is highly recommended for collecting these pickups; waiting out the poison with a small amount of ambrosia effectively negates the negative impact.
Saving Grace is a must have perk to prevent the Poison damage from one-shotting you, while Glass Cannon can prevent a cursed heart from having any effect, if HP is already past the HP cap.
- ↑ 2000 frames of poison (60fps = 33.3secs). The poison does 2% of your max HP of damage per 60 frames. It scales 3x more every NG+ further. By NG+2 you are taking (2*3^2%) 18% of your HP in damage per second.
Spell-Based Healing
In Noita, there are three ways to heal yourself using spells:
- Healing Bolt has 20 charges, each healing 8.75
 , but since it's a spell, it can be modified to increase its efficiency.
 - Circle of Vigour has 2 charges, but a scaling effect. A single circle can heal between 1/4 and 2/3 of your max HP plus up to 21 additional flat HP, depending on whether and how well you stay in its center.
- Deadly Heal fires a projectile that will first hurt oneself, but over time, will heal it for roughly the same amount as Circle of Vigour. Note - this can only heal you if it can somehow target you, like with Piercing Shot or Bloodlust modifiers.
Enemies
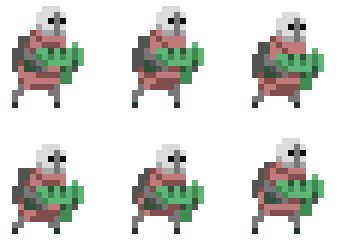
Hiisi Healers
- Hiisi Healers are passive enemies that are found most commonly in the Hiisi Base. They don't have a means of directly attacking you, serving mostly as backup for other Hiisi. However, the same way a Healing Bolt fired by you can heal enemies, the bolt fired by the healers can heal you.
- The most common method is to line-up two healers and stand in the middle. If at least one of them has less than their full HP, the other will shoot, indirectly healing you. Kicking them once each is the best way to keep them active because spells can sometimes deal too much damage to their small HP - this definitely won't work if you have the perk Never Skip Leg Day.
- They also attempt to heal nearby wildlife, like ducks, and fish, which can be used in a similar way.
- You can douse a single Healer in Pheromones which will trigger them to attack (heal) you.
Repair Drones
- Similar to Hiisi Healers, the Repair Drones are healing robots that spawn rarely in The Vault. They also fire Healing Bolts, but at a much faster rate, making them better healers under the right conditions.
- They are very mobile, but since they count as physical objects, the Telekinetic Kick Perk can be used to grab and position them to heal you instead of the enemies.
Masters of Returning
- Masters of Returning have the ability to copy spells fired near it, if it copies a Healing Bolt it will continuously heal you if no other spell is fired after.
- The spells fired by the Master don't have a use-limit so the healing will never run out.
- The Masters of Returning are common in locations inhabited by other master spellcasters.
Perks
Vampirism
- The Vampirism Perk is a reliable but weak source of healing, because most enemies bleed blood but a full flask of it can only heal 40
 . Under the perfect conditions (a huge pool of blood and a flask to drink from), this perk can heal 8
 per second.
 - It synergizes very well with the More Blood Perk or the Blood spell, because these give you more access to blood. It could also work well with Glass Cannon because a single flask of blood could heal 80% of your health.
Blood Money
- The Trick Blood Money Perk is another reliable source of healing, which causes enemies to drop Blood Money when killed by trick kills rather than your spells (rocks, explosive, drowning, etc.). Healing scales with the amount of gold provided by the nugget, with small gold nuggets starting at 2
 each. Note that trick kills provide double gold, so at least 4
 can be dropped per enemy.
 - Healing becomes trivial when combined with the Unlimited Spells Perk and the Rock spell, especially when casting it alongside Burst of Air and various homing spells. Note that Damage Field is considered a spell kill, so will not provide blood money when applied to Rock.
- Also synergizes very well with the Gold is Forever and Trick Greed perks. Note that Trick Greed can be stacked up to 5 times, making even basic enemies drop large amount of blood money on a trick kill.
- The No Wand Tinkering perk also makes enemies drop blood money (20% chance), but at the normal rate for spell kills at the trade-off of not being able to edit wands at all. Having Tinker with Wands Everywhere at the same time allows editing only in Holy Mountains.
Wand Experimenter
- Wand Experimenter: This perk heals a different amount for shuffle and non-shuffle wands, over the course of 7 casts with each cast halving the HP healed per use.
Healthy Exploration
- Healthy Exploration: This perk heals you for +60
 whenever you visit a new biome after picking up this perk.
Extra Life
- Extra Life: When your health reaches 0
 , you are instantly respawned with 100
 .
.
Extra Health
- Extra Health: This perk instantly increases your current HP by 50% on collection.
Healing items
Refreshing Gourd
Refreshing Gourd is an item found in the West Cloudscape and in the Friend Room, that releases a small field similar to the Circle of Vigour. It is one of the few sources of healing with a consistent, albeit dangerous, spawn location.
Kammi
The Kammi is an item found in chests around the world that, when thrown, summons a wooden cot filled with healing bolts whose number scales with your health.
Healing Materials
There are three Magical Liquids and one gas capable of healing you:
 Healthium is an incredibly rare liquid found in flasks around the world. This can either be poured out and then absorbed through contact (restoring 1
 per pixel) or drunk to give 7.5 seconds of
  Regeneration - effectively healing 75% of your health.
- Healium is a gas created when Healthium touches Lava. It heals you directly instead of giving the regeneration status.
 Lively Concoction is an alchemical product unique to each seed. Being stained by it gives the Rapid Healing effect, being a very efficient albeit difficult source of healing. The necessary materials can be found in-game by extreme experimentation (or rather more easily using this calculator).
- The
 Hearty Porridge is a liquid that inflicts 15 seconds of the Regeneration buff for a whole bottle, being capable of healing around 150% of your health. The only way to obtain it is to take the Eat Your Vegetables perk.
Notes
- Healing Bolts have a lot of synergies and anti-synergies. See the spell's page for more details.
- Healing Bolt can be made infinite by setting its lifetime to exactly -1 by using lifetime modifiers, such as 2 Chain Spells.
- The Circle of Vigour is in the pool of Random Static Projectile Spell, so it could be cast from there. Be very careful though, because Matosade and Giga Black Hole are also in the pool.
Gallery
History
- Nov 5 2019: Full Health Regeneration now states how much HP you've regained.
- Oct 11 2019: Full Health Regeneration now increases max HP by 10.


