The Tower
Going to the far left and up from the Temple of the Art, you'll reach a portal encased in lava leading to The Tower, which is a secret area enabling you to more easily access the surface after (or before) defeating Kolmisilmä.
Layout
The path through The Tower is like descending the main path, but instead of going down, you're climbing back towards the surface. You start at a small version of the Mines, leading up to the Coal Pits, then the Snowy Depths, onto the Hiisi Base, connecting to the Fungal Caverns, followed by the Underground Jungle, into The Vault, up to the Temple of the Art, then to a small instance of The Work (Hell), and finally to a portal room. All these biome layers are significantly shorter than in the main path going down.
Unlike the normal areas you go through when descending, The Tower does not have any other connecting areas aside from the main layers (with the exception of the Fungal Caverns). It's all one single path to the finish.
Scaling the far left or right side of The Tower is extremely dangerous - the outer walls are made of Cursed Rock, which is very hard to dig and has both contact damage and a damage field even if it is excavated.
Features
It is still possible to find wands in The Tower, but they are the same spell tier as wands found in the biome they correspond to in the main area. Hence, for the stage of a run at which you can access The Tower, they are relatively weak.
Interestingly, traps and explosives spawn regardless of biome; for instance, oil drums are not found in the Temple of the Art, but they are found in the equivalent layer of The Tower. This is due to The Tower being treated as a single biome, with the mini-biomes within it not being actual biomes in terms of code.
Enemies
Each of the layers can spawn all the enemies available previously, including the angry god summon Stevari, as well as some new enemies not seen anywhere else. The enemies drop more gold and have 4x their normal health, and some of them can be encountered anywhere in The Tower regardless of the biome they originally belonged to.
Due to the increased randomness of the enemies that spawn here, fighting between factions is more common than in other areas of Noita. If unprepared for The Tower, or finding it overwhelming, allowing enemies to fight it out between themselves can help you in progressing.
The Summit
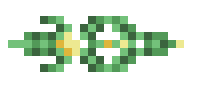
Reward Diamond
In the room at the top of The Tower there is a diamond-shaped structure containing three named wands. These wands don't have a tier assigned to them and have minimal stat variation:
WAND OF SWIFTNESS
WAND OF DESTRUCTION
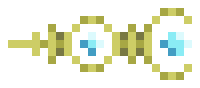
WAND OF MULTITUDES

The spells that may be found on these wands is of a fairly limited selection, but the quantity of spells on them will always be as shown above.
- Wand of Swiftness: Concentrated light, Magic bolt, Energy orb, Magic missile, Glowing lance
- Wand of Destruction: Giant magic missile
- Wand of Multitudes: Giant firebolt, Giant magic missile, Meteor, Magic bolt, Disc projectile
Once you pick up one of the three wands, the other two vanish. Be aware that enemies can also pickup these wands, often picking up whichever they can reach first; this will also trigger the other two wands to vanish.
Avarice Diamond

To the left of the wand box is another diamond-shaped structure made of diamond brickwork. This diamond has four functions, only one of which can be activated per run normally. Extra avarice diamonds can be triggered in the same run by triggering a peaceful ending to reset the world you are in. Sometimes snow chasm and hills biome cross into other biomes in ng+ worlds to spawn invisible avarice diamond triggers. Entering the diamond will trigger it to activate, with the effect depending on a few conditions.
- If you have the Curse of Greed active, entering the diamond will grant you the Divide By 10 spell, and it can thereafter spawn randomly in unvisited areas in the world and future runs. The curse itself will not be lifted.
- If a Kauhuhirviö enters the diamond, a live Nuke and a Giga Nuke spell will be spawned inside the diamond, unlocking it for future runs.
- If a Toveri enters the diamond, a live Nuke and a Giga Holy Bomb spell will spawn, also unlocking it.
- If none of the above conditions are met, the Burst of Air spell is granted instead.


Mountain Portal
Once you enter the portal at the top of The Tower, you will be teleported to the peak of the Mountain above the initial entrance to the Mines.
Trivia
- The physical location of The Tower itself is actually underneath the Sandcave and the Pyramid, as can be seen on the biome maps. It's encased in a rectangular wall of Cursed Rock. It is possible to enter the Tower at any point if you have the means to dig through the cursed rock and survive the damage. Digging from the Orb Room in the Sandcave directly downwards is a fairly reliable method of accessing the Tower.
- The curse area is a 500px square as a chunk is 512px square. This means that you can dig and pass without taking damage. Lukki Mutation, Tannerkivi or Ground To Sand is recommended for avoiding direct contact with curse rock. It is easy to find the border at the edge of the orb room, then dig down vertically.
- The Tower spawns in Parallel Worlds, although the portal leading to it will take you back to the main world. To access parallel worlds' Towers, you must dig through the cursed rock barrier. The portal at its summit will also return you to the main world, and the Avarice Diamond is not present in parallel worlds.
Soundtrack
Music that plays here includes:
Track 13 of Noita Official Soundtrack vol. 3 is titled "Out-take IV - Torni".[1]
History
- Dec 19 2019: Added Sähikäismenninkäinen enemy.
- Nov 28 2019:
- Added Kilpihiisi enemy.
- Added Peitsivartija enemy.
- Added Jättikonna enemy.
- Nov 5 2019: Added to the game.